
A hike camp is one of the more demanding camping experiences for a Scout in the 12 to 15 age bracket. You carry everything you need on your back, you plan and prepare your own food, you set up your own shelter, and you look after yourself in the field for multiple days. The preparation you do before you leave makes the difference between a trip that goes well and one that is uncomfortable or ends early.
This packing list covers every category of gear for a self-sufficient hike camp in Australia: multi-day, own food, own tent, own cooking. It is written with enough detail to make actual decisions rather than just check boxes.
Pack
Everything else on this list lives inside your pack, so the pack itself is the first decision. For a 2 to 3 night hike camp you need between 40 and 55 litres of capacity. For 4 or more nights, aim for 55 to 65 litres. Do not use the biggest pack available just because it fits everything — a 75-litre pack on a smaller person is harder to carry than a well-fitted 50-litre pack with a good hip belt transferring load onto the hips.
- Backpack, properly fitted — the hip belt should sit on the hip bones, not the waist
- Pack liner or large dry bag (rubbish bags fail under load and prolonged rain)
- Pack rain cover if the pack does not have an integrated one
- Small day pack or bum bag for summit days or off-route objectives if the programme requires one
Tent and Shelter
On most hike camps you will share a tent with one or two other Scouts and divide the weight between you. Before you leave, confirm who is carrying the inner, who has the fly, and who has the poles and pegs. Carried separately the weight is manageable. A solo carry of an unplanned tent allocation is not.
- Tent inner and fly — confirm the tent allocation with your unit leadership before packing
- Tent poles
- Tent pegs — usually 8 to 12 depending on the tent model
- Mallet or small rock hammer for harder or rocky ground
- Guy ropes — check they are attached and present before leaving home
- Groundsheet or footprint if the tent does not have a sewn-in floor
Pitch the tent at home before the trip. The first pitch should not happen in the dark after a long walking day.
Sleeping System
The sleeping system matters more than almost any other gear decision on a hike camp. A cold night in an inadequate sleeping bag is miserable and has real safety implications in poor conditions. For most Australian spring, summer, and autumn hike camps you need a sleeping bag rated to at least 5 degrees Celsius. For winter or alpine environments, choose a 0 degree or lower rating.
- Sleeping bag rated for the expected overnight low temperatures on your specific route
- Sleeping mat — closed-cell foam mats are lighter and more durable; inflatable mats are more comfortable but can puncture
- Pillow — a compression sack stuffed with a spare fleece layer keeps the weight down without sacrificing much comfort
Cooking and Food
On a hike camp every Scout is responsible for planning and preparing their own meals unless the unit assigns cooking pairs or small groups. Planning food before you leave is the most important preparation you will do, outside of choosing a sleeping bag.
High-energy, lightweight food is the goal. A moderately active hiking day requires roughly 10,000 to 12,000 kilojoules. Freeze-dried meals, pasta, rice, oats, nuts, dried fruit, and energy bars are all good options. Avoid anything heavy that does not contribute proportional energy — tinned food, fresh fruit, and anything in glass packaging all fall into that category.
- Single-burner backpacking stove
- Fuel canister — calculate your burn time per meal and carry enough for all meals plus a safety margin
- Lighter and a backup (waterproof matches in a zip-lock bag)
- Cook pot with lid, 500 to 1000ml capacity is sufficient for one person
- Plate or bowl
- Spork or spoon
- Mug for hot drinks and soups
- Food for each day: breakfast, lunch, dinner, and snacks
- Zip-lock bags for pre-measured meals and loose snacks
- Stuff sack for food storage
- Rubbish bags for packing out all food waste — leave no trace
- Tea Towel for drying up your kit
Set up your kitchen area away from your tent. Food smells attract wildlife and insects, and keeping the cooking and sleeping areas separate is standard bush camping practice.
Water
On most hike camp routes in Australia you cannot rely entirely on natural water sources without a filtration or purification method. Check with your unit leadership whether water sources on your specific route are reliable before deciding how much to carry. If uncertain, carry more.
- Water bottles or reservoir with at least 2 litres total capacity
- Hydration bladder for drinking on the move without stopping (optional but useful)
- Water filter or purification tablets if the route relies on stream or tank water
- Collapsible container for camp water storage if water points are infrequent on the route
Clothing and Layers
The layering system handles temperature change between hiking at midday and sleeping at night, and between dry conditions and wet weather. Three layers: a moisture-wicking base layer against the skin, an insulating mid-layer, and a waterproof and windproof outer shell. Cotton does not work in any of those roles because it absorbs moisture and loses all insulating ability when wet. Merino wool and synthetic fabrics are what you want for base layers.
Pack for the weather expected, but always include a warm layer and a wet weather layer regardless of the forecast. Weather in the Australian bush changes faster than forecasts update.
- Moisture-wicking base layer top — merino or synthetic, bring at least two
- Insulating mid-layer — fleece or a light packable down jacket
- Waterproof and windproof outer jacket with hood
- Waterproof over-pants or rain pants
- Camp pants or softshell pants for evenings
- Shorts for day hiking if conditions allow
- Wool or synthetic hiking socks — minimum three pairs
- Underwear — one set per day
- Warm beanie or buff
- Sun hat or cap with a brim
- Gloves — lightweight liner gloves at minimum; heavier if cold overnight temperatures are forecast
- Gaiters for terrain with long grass, thick scrub, or muddy tracks
Footwear
Do not hike in new boots. If you are getting new footwear for this trip, start wearing them at least four to six weeks before the camp. Blisters from unbroken boots on day one of a multi-day hike camp make every subsequent day harder and create infection risk on remote routes.
- Hiking boots or trail shoes — worn in and appropriate for the terrain
- Camp shoes or thongs for around camp in the evenings
- Neoprene socks if the route includes creek crossings
Navigation
You should be able to navigate your route with a map and compass and not rely entirely on a phone or GPS device. Batteries fail, devices get dropped in water, and screens crack. Know how to take a bearing and read a topographic map before the trip starts.
- Topographic map of the route area in a waterproof map case or zip-lock bag
- Orienteering compass (baseplate style)
- Route card with waypoints, distances, and timing gates written out before you leave
- Watch — knowing the time is essential for timing gate decisions in the field
- GPS device or phone with offline maps loaded, used as backup only
- Spare batteries or power bank for electronic navigation devices
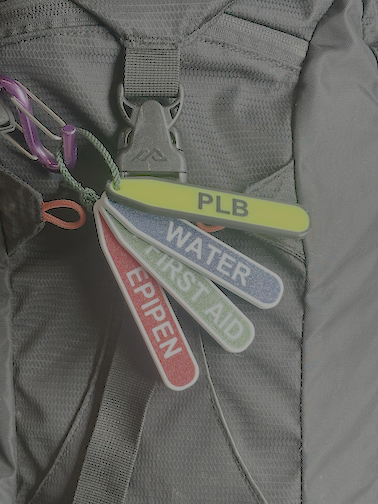
Safety
Unit leadership will carry the group first aid kit and the PLB. You still need your own basic first aid supplies because the group kit is for emergencies, not for blisters and headaches on day two.
- Personal first aid: blister kit (Compeed or moleskin), bandaids, antiseptic wipes, pain relief, any personal medication
- Emergency whistle — attached to a shoulder strap or chest clip so it is reachable without removing the pack
- Headlamp with fresh batteries — test it before you leave
- Spare batteries for the headlamp
- Emergency space blanket — negligible weight, takes almost no space, and has saved lives
- Copy of the route card and emergency contacts kept separate from the main navigation kit
- Personal PLB or EPIRB if required by your unit or the conditions of the route
Personal Kit
Personal kit is the category where over-packing is most common and most regretted. Everything here should fit in a small zip-lock bag or a lightweight toiletry bag.
- Sunscreen SPF50 or higher — apply before you start walking, reapply every two hours
- Insect repellent
- Lip balm with SPF
- Toothbrush and toothpaste in a travel-size container
- Biodegradable camp soap
- Small microfibre towel
- Toilet paper in a zip-lock bag
- Hand sanitiser
- Small trowel for cat holes in areas without toilet facilities
- Any personal hygiene or medical items required
Admin and Repair
- Pencil and small notebook — pens fail in wet weather
- Zip-lock bags for anything that cannot get wet
- Duct tape and a small repair kit: needle, thread, tent pole repair sleeve
- Rubbish bags for carrying out all waste from the route
What to Leave at Home
The most common over-packing mistakes on Scout hike camps are consistent enough to name specifically.
- Cotton base layers and cotton socks — they get wet and stay wet for a long time
- More than one book or any non-essential entertainment
- Portable speakers — they are out of place in the bush and create group conflict
- Full-size toiletries — travel sizes only
- Tinned food — heavy, low energy density, and the empties are rubbish you carry out
- Glass containers of any kind
- Extra t-shirts beyond what the layering system requires — they do not help
- A regular pillow — use a compression sack filled with a fleece layer
- Extra shoes beyond a pair of camp shoes
A printable two-column checklist covering every item on this list. Open the page and click Save as PDF, or print directly.